Hosting on Azure
The easiest way to get started with Fider is to use our Cloud Instance - no installation, no worrying about updates, setup, configuration, or maintenance.
💪 Sign up now for a 15 day free trial.
Prerequisites
An Azure subscription
It's free to start, but will require a variable monthly payment afterwards.
E-mail Sender
You can choose between a SMTP Server or a Mailgun account.
Deploying your instance
Step 1: Create a new PostgreSQL Database
Using Azure portal, crease a new instance of Azure Database for PostgreSQL servers using the Official Guide.
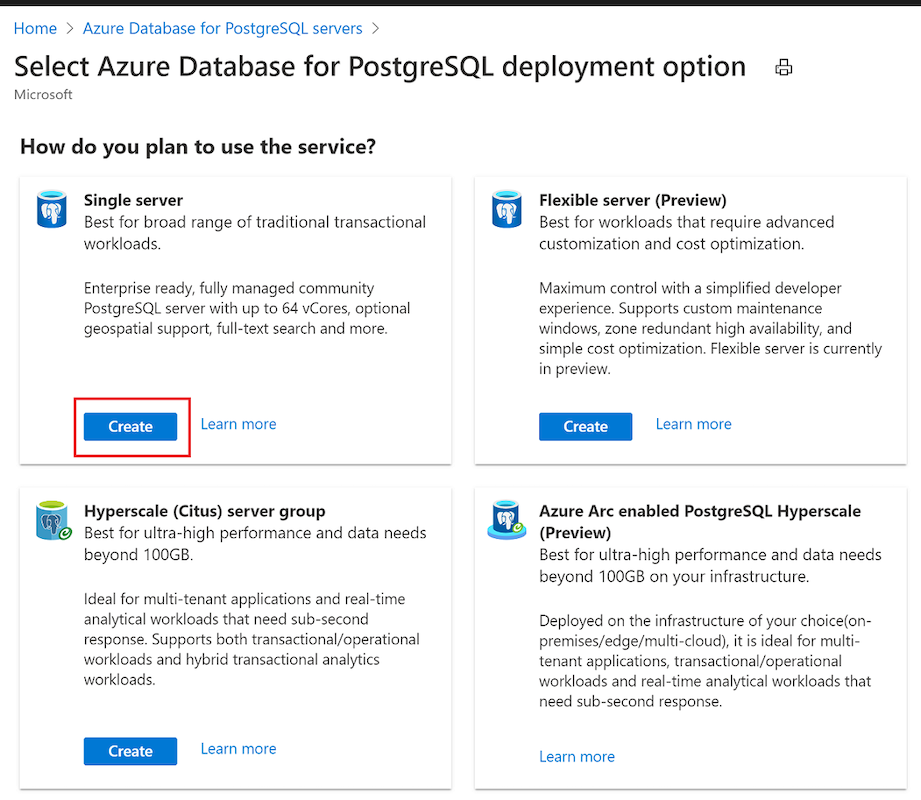
The guide above also explains how to configure Firewall and create a Database using psql. Follow that process and create a database named fider.
CREATE DATABASE fider;
Alternatively, you can also install PostgreSQL on a Virtual Machine.
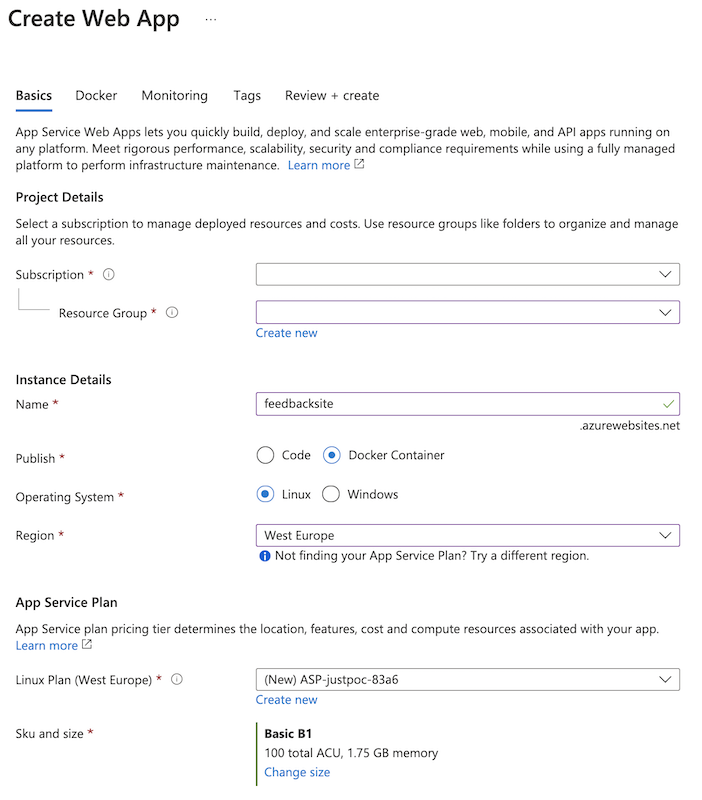
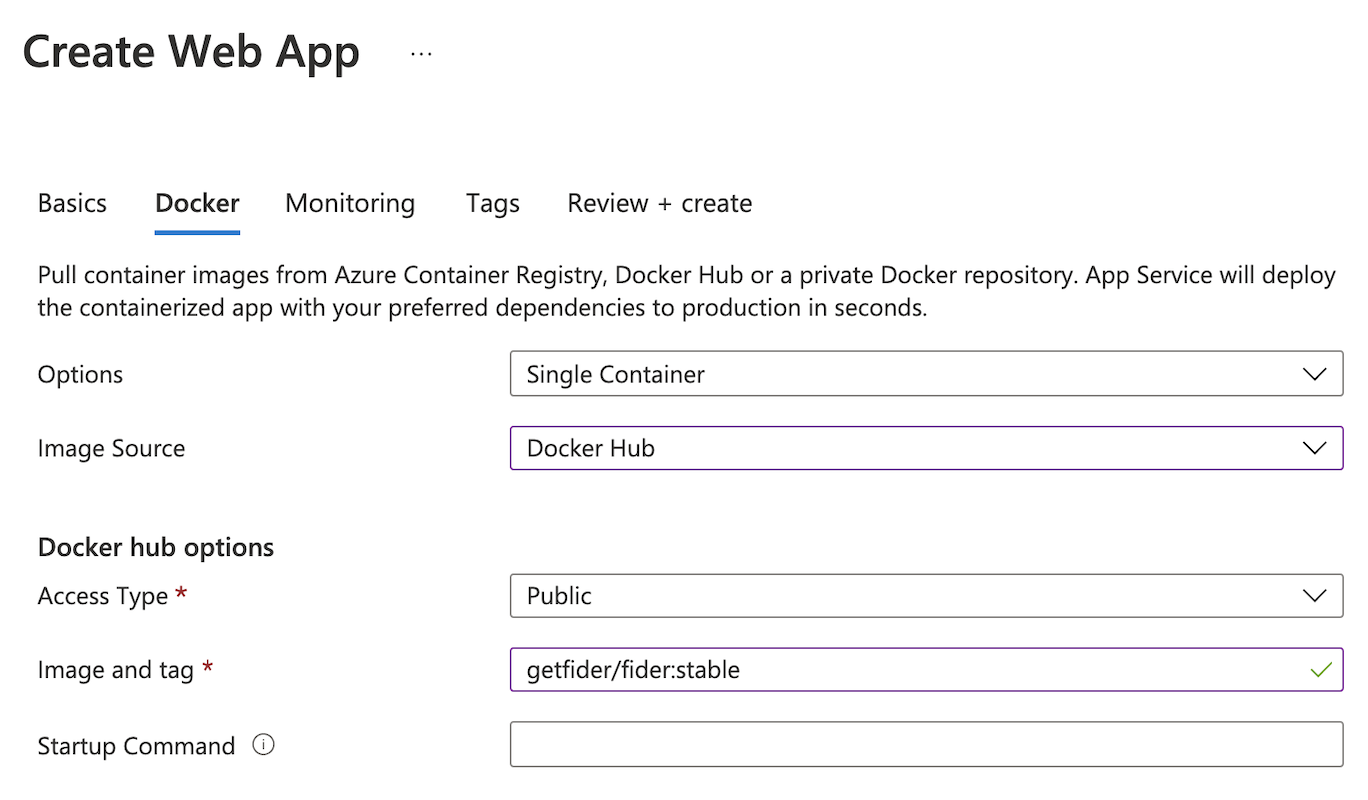
Step 2: Create an Azure App Service
Azure App Service (also known as Azure Web App) is where the actual application will be hosted. Using Azure portal again, search for Azure App Service and create a new instance.
We recommend using Linux and Basic B1 at a minimum, but if you're expecting higher traffic, upgrade to a more suitable tier.
Step 3: Configure your App
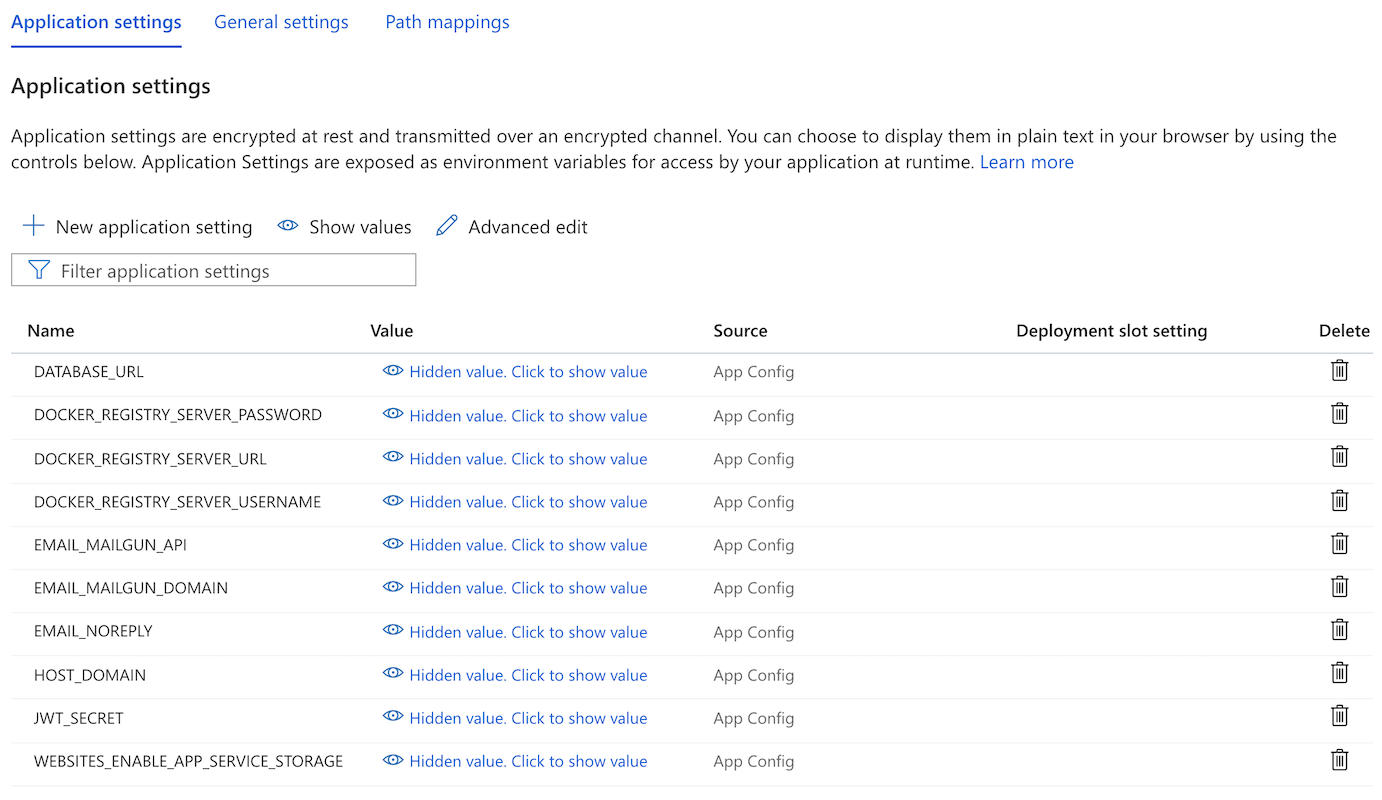
Select Configuration on your App Service blade and add the following Application Settings:
DATABASE_URL: postgresql://{POSTGRES_SERVER}.postgres.database.azure.com:5432/fider?user={DB_USERNAME}@{POSTGRES_SERVER}&password={DB_PASSWORD}&sslmode=requireBASE_URL: https://yourapplicationame.azurewebsites.netJWT_SECRET: It's a secret key used for authentication tokens, you can generate a good secret using an online tool like this one (take at least 512-bit for security).EMAIL_NOREPLY: Set this variable to a no-reply address associated to your instance.EMAIL_MAILGUN_API: Your Mailgun API key.EMAIL_MAILGUN_DOMAIN: Set this variable to your Mailgun domain.
If you're using plain SMTP to send emails, you need to replace MAILGUN_* variables by the equivalent SMTP variables: EMAIL_SMTP_HOST, EMAIL_SMTP_PORT, EMAIL_SMTP_USERNAME,EMAIL_SMTP_PASSWORD.
Save your Application Settings.
Step 4: That's it!
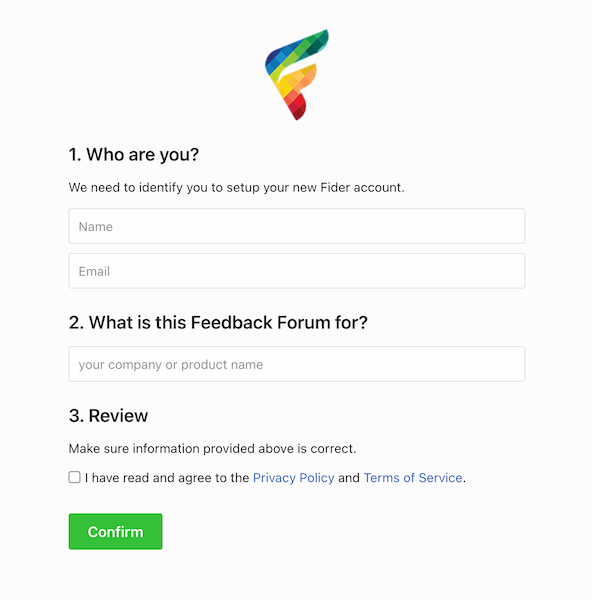
It might take a few seconds for the application to restart and load all the new settings. Once that's done, open https://{your_appname}.azurewebsites.net and you should see the signup screen to create your Administrator account, and you can enjoy your Fider instance and share it with your users.